You just finished using our Continuous Campaign Creator tool, and now you want some extra configuration; let's see how to get that done!
You just finished setting up your continuous phishing campaign through the Continuous Campaign Creator tool, and now you're looking to configure and adjust its parameters.
In this article, we will be discussing the following...
Let's dive in!
Start by clicking the edit icon (pencil) for the campaign you want to edit as shown below.


Step 1: How to Select an Audience
Now that we've entered into the campaign tool, our first step is to select an audience.
You have four options for delivering campaigns.

- Company Campaign
The company campaign option will deliver this campaign company-wide. So, everyone currently on the platform and any future new users will be added to this campaign. - Department Campaign
The department campaign option allows you to deliver this campaign to a specific department within the company.
If you don't know how to add departments to your users, click here. - Manager Campaign
The manager campaign option allows you to deliver this campaign to a specific manager within the company.
If you don't know how to add a manager's email to your users, click here. - Group Campaign
The group campaign option allows you to run campaigns to specific Azure Groups. This option will only be present if you have connected an Azure Sync to our platform.
When you select which group or groups you'd like to deliver this campaign to, you will see the user count reflect the number of users contained in the group(s).
Now that you've selected the audience that you'd like to receive this campaign, let's set the schedule.
Step 2: How to set the schedule
Setting a schedule is easy with our scheduling tool. First, let's discuss how the tool works in conjunction with the Continuous Campaign Creator tool.
Important note: All training is set to fire on the first Monday of the month by default.
Recurring Scheduling
Recurring schedules allow you to designate a specific date and time window for the first phishing simulation, followed by a recurring schedule in which the subsequent phishing windows are determined. Let's walk through an example:
.png?width=688&height=215&name=Phin%20Security%20_%20Campaign%20Editor%20(15.04.2025%2012_04).png)
You have five options to adjust the campaign schedule.
- Frequency of sending
From the drop-down menu, select Once or Twice. - Changing the frequency of delivery
The second option will allow you to select Weekly, Monthly, or Quarterly. - Changing the week of delivery within the campaign
The third option allows you to adjust the week the campaign should deliver in any given month or time period. - Changing the delivery day of the week
The fourth option will allow you to adjust what day of the week you'd like your campaigns to deliver on. - Changing the time of the delivery
The fifth option will allow you to change the time at which the phishing campaign begins to fire. - Changing the phishing window
The sixth option allows you to change the range of time phishing simulations are delivered, also known as our phishing windows. To learn more about how phishing campaigns deliver, click here..png?width=688&height=482&name=Phin%20Security%20_%20Campaign%20Editor%20(15.04.2025%2012_06).png)
Step 3: How to configure phishing templates
Below the scheduling tool, you'll first see Sending Channels and Learning Moments.
%20(1).png?width=688&height=681&name=Phin%20Security%20_%20Campaign%20Editor%20(15.04.2025%2013_26)%20(1).png)
You will notice that you can't change the Sending Channel or Learning Types for Continuous Campaigns. They are set by default to the recommended setting.
If you want to include other learning types, such as Video, you can include templates that have a video component (Currently, this is under development, so it is not recommended to use until it is updated).
If you want to include other learning types, such as Custom URL, you must have templates that you've created that utilize a Custom URL; otherwise, the campaign will have no templates to use from that learning type.
Video and Custom URL learning types do not track Learning Moment completion in the portal. Only the Learning Moment learning type will record if the user has finished the Learning Moment.
Below the Learning Types, you will see Template Categories. These template categories organize our templates, making it easier for you to turn off entire categories of templates at once.
Template Categories are selected depending on how you answer the questions in the Continuous Campaign Creator tool.
.png?width=688&height=335&name=Phin%20Security%20_%20Campaign%20Editor%20(15.04.2025%2013_28).png)
Find a template category you'd like to review and click the view icon on the right.
%20(1).png?width=688&height=336&name=Phin%20Security%20_%20Campaign%20Editor%20(15.04.2025%2013_28)%20(1).png)
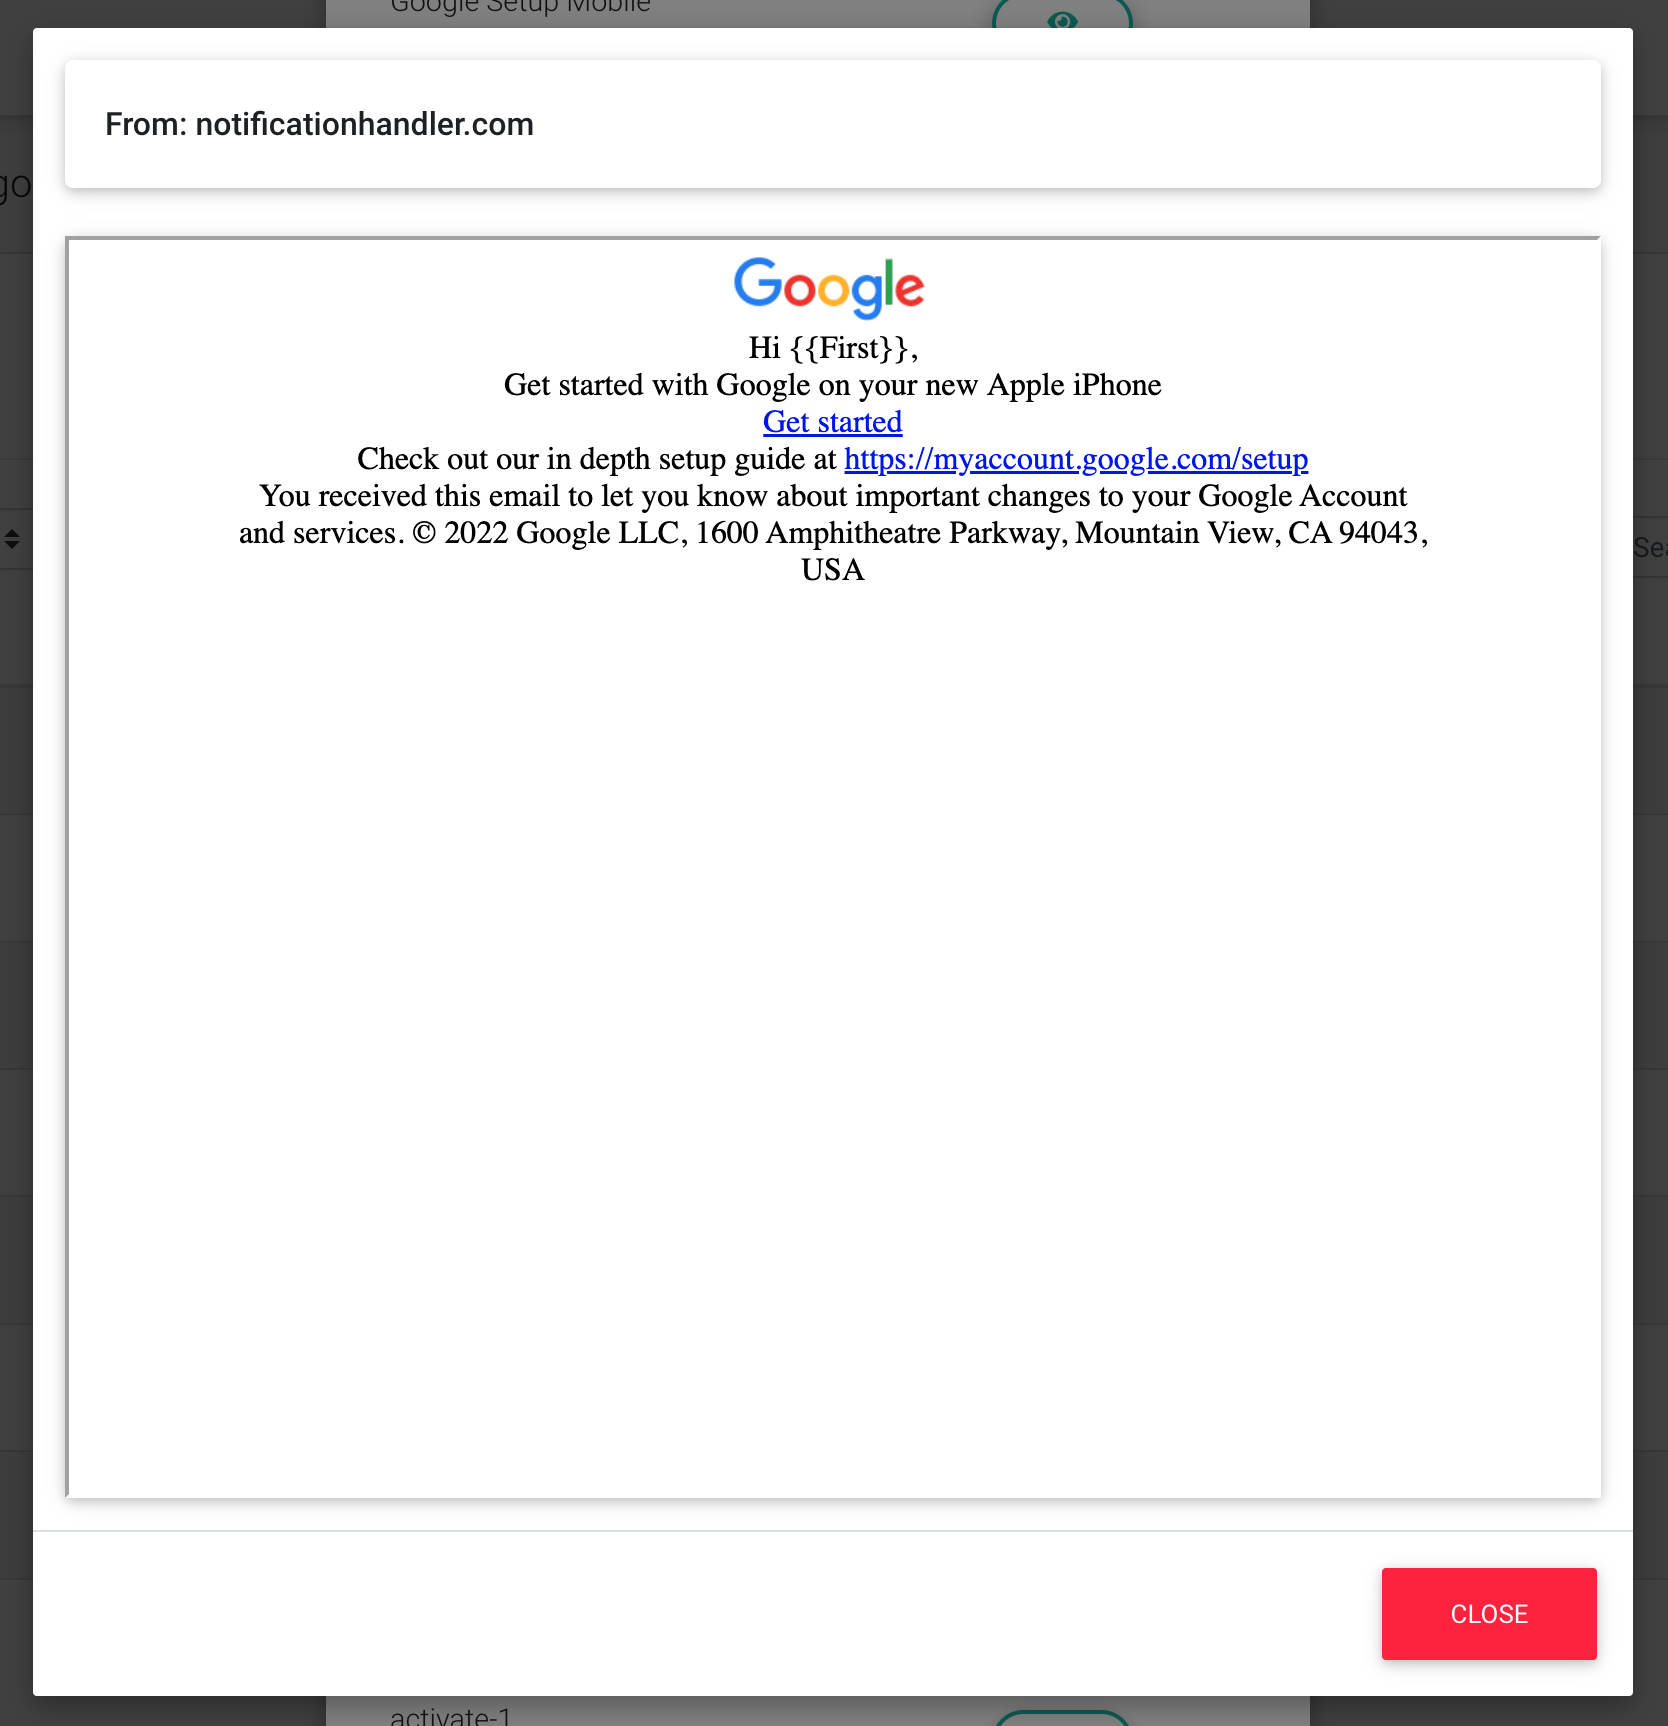
You will then see a list of all the templates within that category. To preview the template, click on the green eyeball within the template list.
%20(1).png?width=688&height=402&name=Phin%20Security%20_%20Campaign%20Editor%20(15.04.2025%2013_29)%20(1).png)
This will bring up a preview of the selected template.
Step 4: Save & Launch
Finally, to launch the campaign, you only need to click Save at the bottom of the page.